
GERRIT KLAASSEN
WOODWORKER - RECYCLER - WRITER - MAKER
NOT JUST SAWDUST
NÃO SÓ SERRADURA
PORTUGAL
|
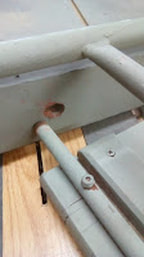
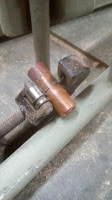
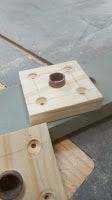
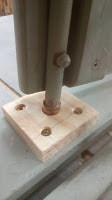
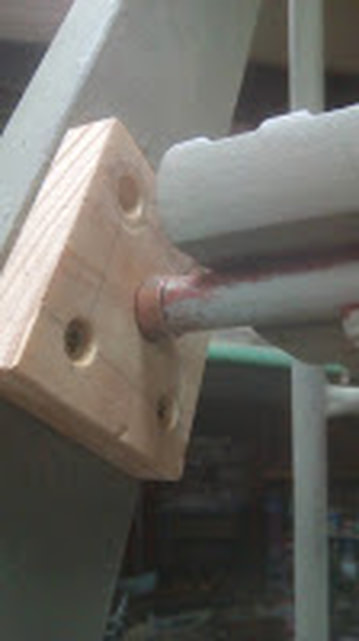
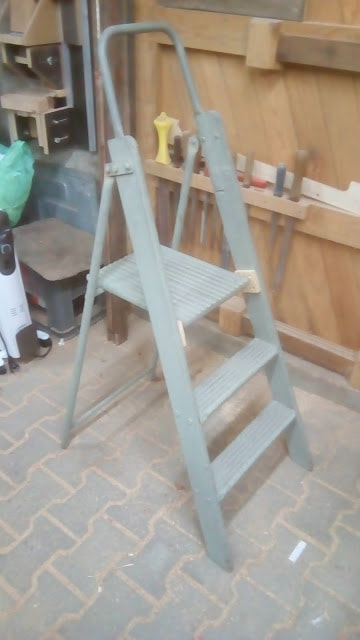
Good old quality craftsmanship. Sometimes you just don't realize that you are relying on the skills of a woodworker / carpenter / maker from decades ago. When you used an old stepladder happily for years it doesn't come to mind that at some day even the product of decent carpentry will break down. The good thing about older tools and furniture (called vintage nowadays), is that it is absolutely rewarding to repair them. (unlike the plastic mass produced stuff) This is an example of just a simple old wooden stepladder.
It turned out a good solution. The rod goes 2 cm deeper in to the holes on both sides which makes it a sturdy connection After a coat of paint this repair won't have changed much to the looks, and this little stepladder will be a safe device for many years to come, for instance to put the Christmas decorations up!
3 Comments
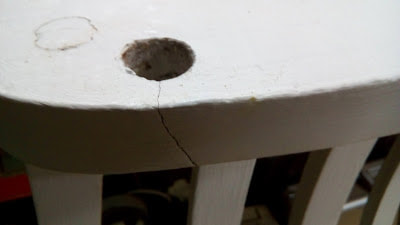
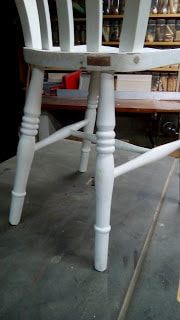
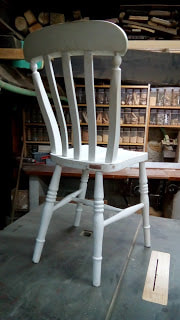
Just a wobbly old chair, well maybe not just. There was a crack that went thru to one of the back legs with all consequences of... falling apart. It was just a matter of a little brace, some dowels and some glue... Here's the process of repairing an antique chair without making it look like a new one.
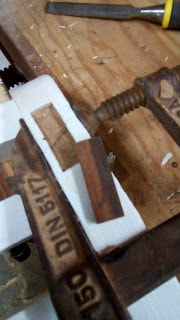
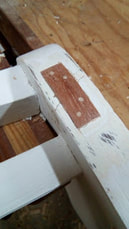
The crack in the seat at one of the rear legs. Taking all apart without damaging the parts.
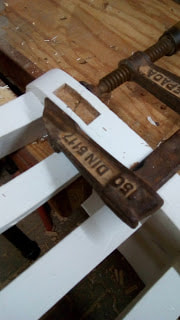
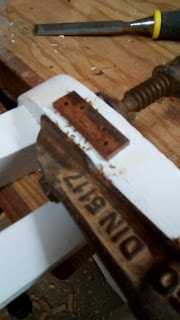
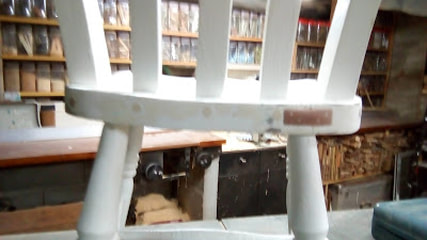
Chiseling out the place for the bracket (mahogany) gluing in, drilling holes and some reinforcement with dowels. Planing the bracket but leaving it just a millimeter proud of the surface, a repair to an antique chair should look like it's been done sometime ago.
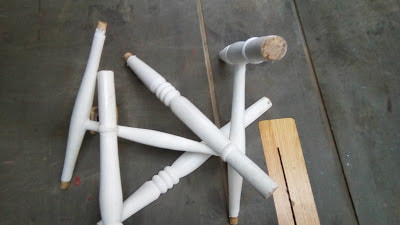
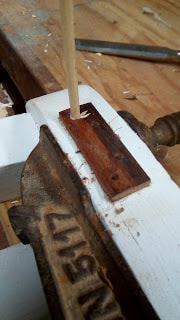
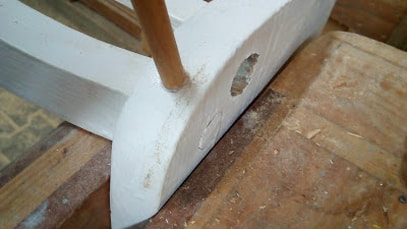
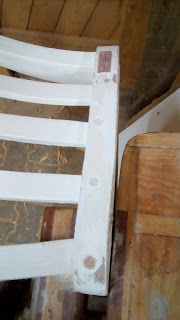
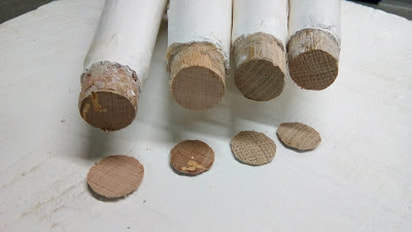
The back was lose to, 2 10 mm beech dowels were hammered in all the way thru the tenons of the back. The three insite thinner parts of the back got the same treatment, only with 8 mm dowels.
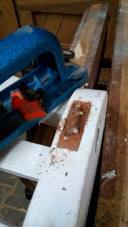
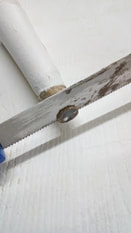
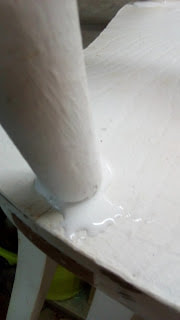
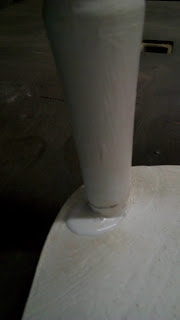
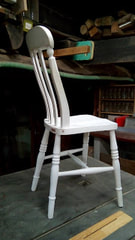
The legs were cut 1 mm shorter, so the fitting became tighter. It's great to find that a little Japanese pull saw is capable to cut slices of 1 mm. You can't use to much glue if there's room for it to squeeze out of the joint.
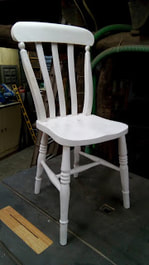
The oak legs were put back into the cherry wood seat. It's up to the owner of the chair whether to leave the repair visible or not.
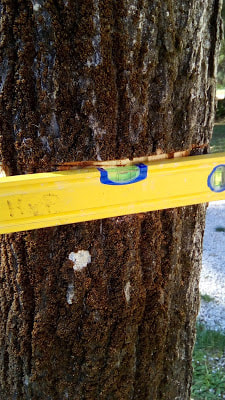
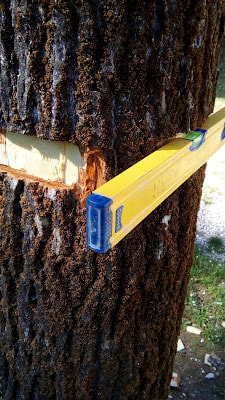
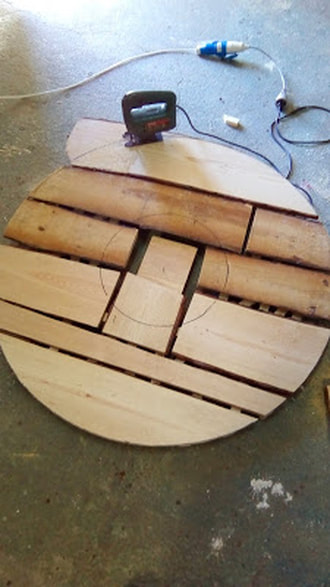
Just before taking the decision to cut down the last 2 meters of a poplar we came up with the idea to make a little meeting point for guests at the campsite of some friends. A table around the tree, maybe in the future to be complemented with some kind of roof. The first step was placing 4 brackets....
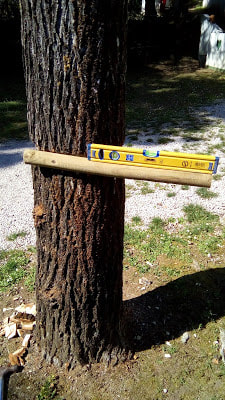
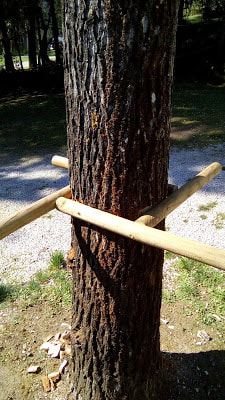
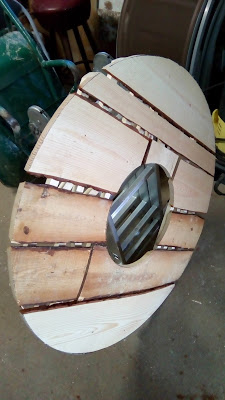
Once every bracket was leveled out they were nailed in to the groves that were cut out of the tree and the brackets were screwed together. Than the table top needed to be made. Only cut-offs of former projects were used and some reclaimed wood. All connected together with random layers underneath to just avoid that "formal" look.
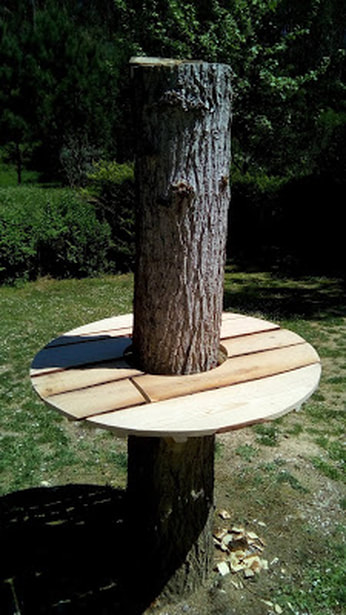
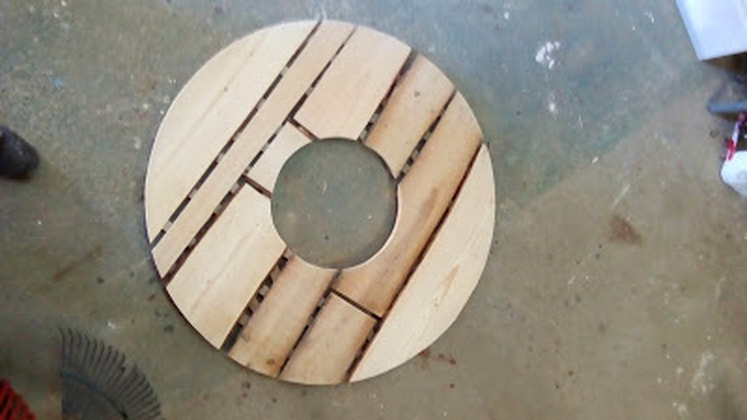 Because the tree was cut down for most part, it was easy to slide the table-top over the tree trunk.
After screwing the top on the brackets it got a treated with Nilzone, a stain that protects against all wood loving bugs. It's not clear where creativity will bring us, but something like bar stools and some roof are most likely.
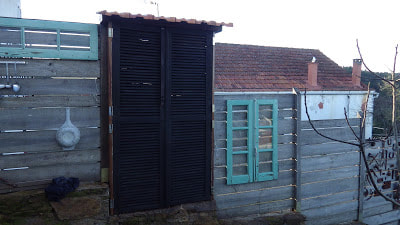
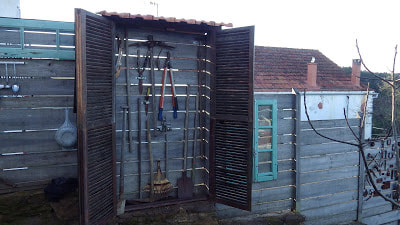
Yes, they were neglected, our garden tools. There's no place for them in the workshop and normally we keep them in the firewood shed, but well, that's getting filled up and so... A few weeks back we got hold of some old hard wood shutters, a bid bend but, you're not supposed to "Look a given horse in the mouth!" Together with some planks of an old door frame we build a Garden Tool Cabinet.
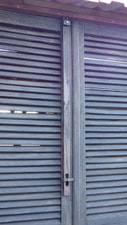
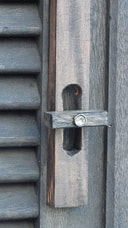
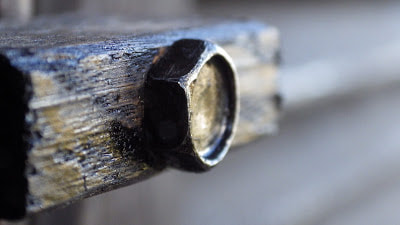
All materials for this build are reclaimed or recycle. The screws, nails and even the hinges are "second hand"... Because the shutters that we found are a bit warped, we had to come up with a system to close the doors, that would... "bend them in place".
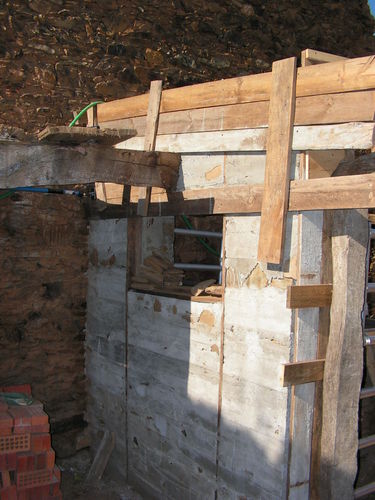
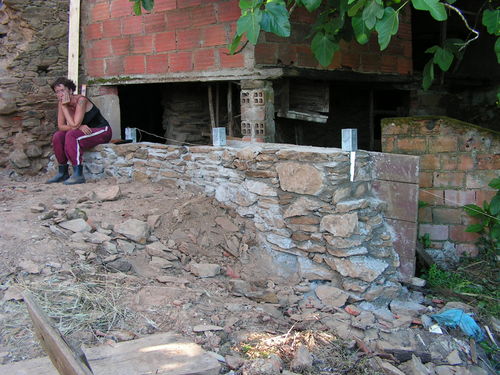
June 2011, finally we started building something. Now for garden walls etc. it’s obvious to use a dry stone techniques. However for the walls of the “workshop to be”, we decided on a hybrid system. This means putting up a mold for the inside, laying the stones in cement (is easier to fill the gabs) and the backside is filled up with concrete and little stones. This all makes it easier to have some rendering on the inside.
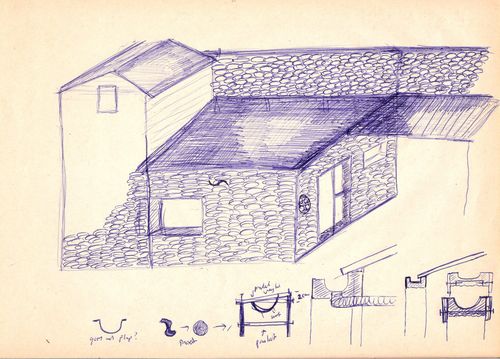
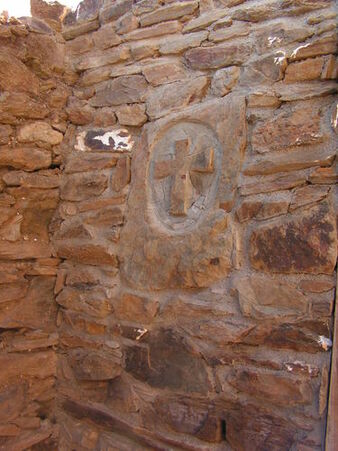
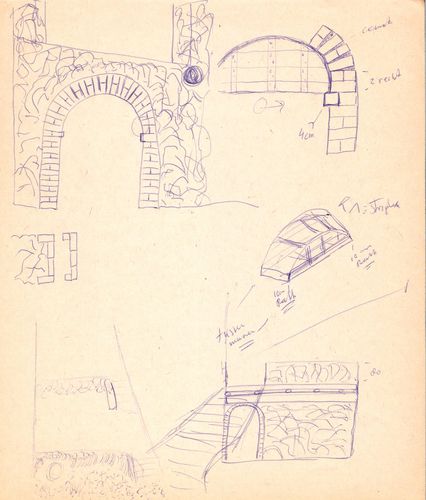
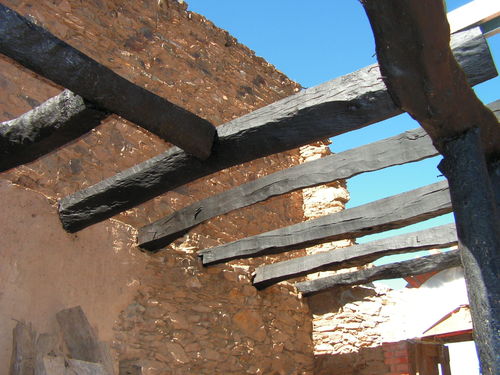
We decided way back that we wanted the original walnut beams to stay, and used it as a feature by integrating it into the wall. Because we are in the land of the Templar Knights we allowed ourselves to fake history a bit by carving a Templar Cross in one of the big stones. Slowly the building started to look like the plans that were drawn on the back of a shoe box, even before we bought the ruin.
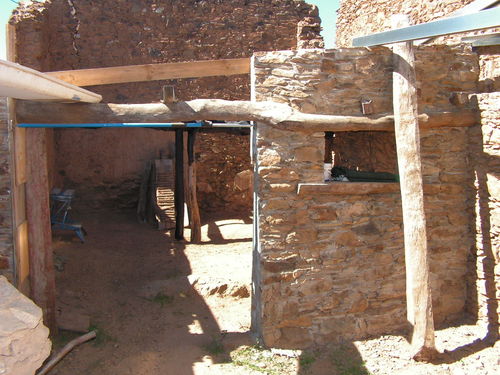
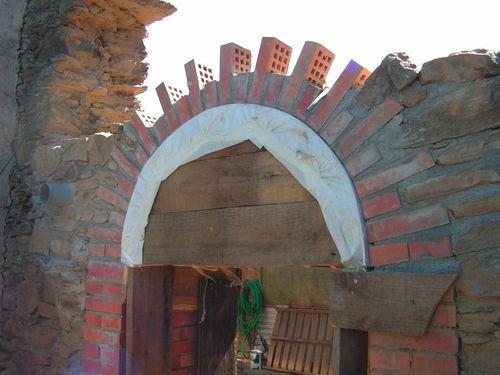
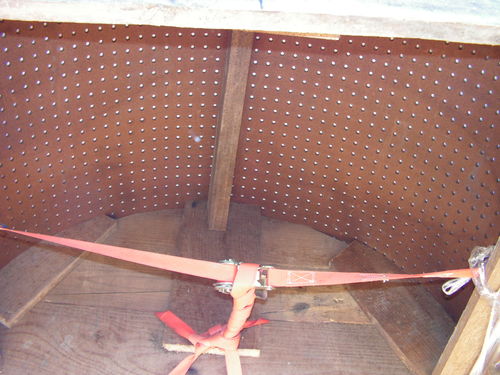
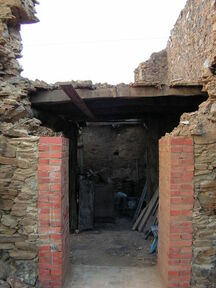
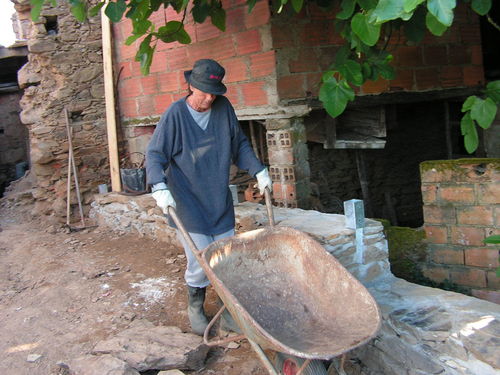
Finally the combination of old and new started to show. The biggest challenge up until than was to make the arch. I just made a mold and started laying bricks. The hardest work however seemed to be remodeling the old wall. Some of these stones are very heavy, and you can’t use just little ones.
With the original beams now treated against attacks from all kinds of wood loving bugs, they were painted black. Somehow this progress gave us a bit more energy, working many hours to get closer to our dream workshop.
Still, the human body can only take so much battering…. and it would make sense to give the old back and shoulders some rest. It took a few little accidents and hurtful events to make me see the sunlight, the barbecue and the lounge chair on the terrace as a good remedy.
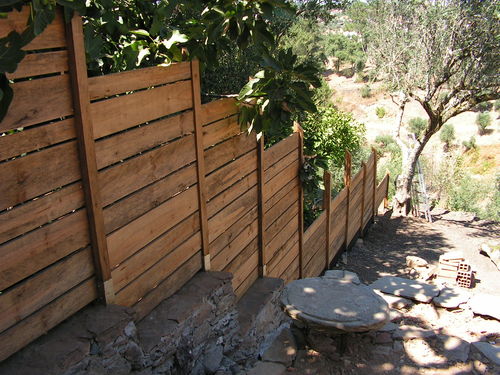
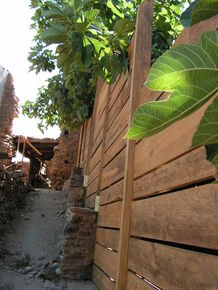
Because we run a B&B and recording studio next to our “dream building” it took until oktober 2011 before the work would get into it’s second (or was it third) fase…. Next time; Finally some carpentry. The view, the reason for buying a 200 year old derelict cottage at this place in the rural heart of Portugal, is sometimes scary. Bush fires are common during the summer. In this case our view from the hilltop became a dark spectacle. 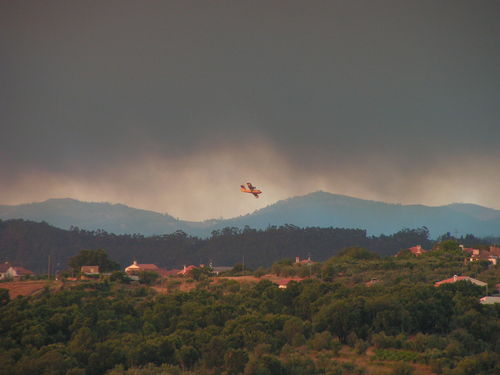 After a few years you get use to it, and it makes you carefull with fire. Sometimes it’s the only way to get rit things, so at the first rain fall in October…. 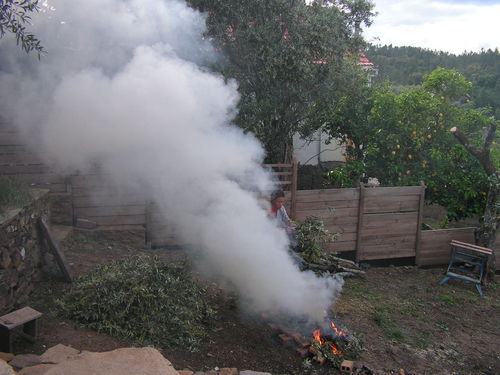 To show that there is some woodworking involved during the first years of the rebuild, some pictures of the fence that’s placed upon the separation wall with the neighbors. Yes, it’s made out of Eucalyptus, for some an unbelievable choice, but here it’s the cheapest wood around.
Now building up the workshop could only start after removing all the walls that were to fragile and some of them even in the way. To make space for a car in front of the workshop we decided to reduce the size by a third. Taking away an outside wall means building an other one though.
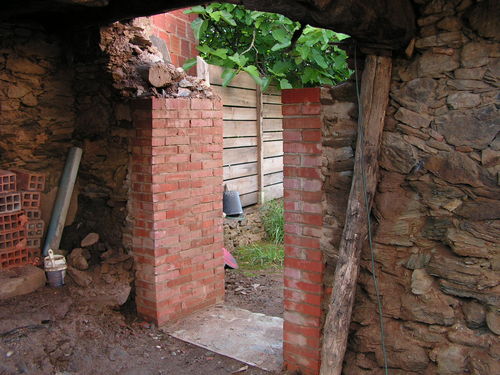
To make sure that the wall on the backside wouldn’t get worse during the first rain in autumn, I started there by making the door frame. For the first time in my life I’m laying bricks and made the decision to make an arch. The first real building up!
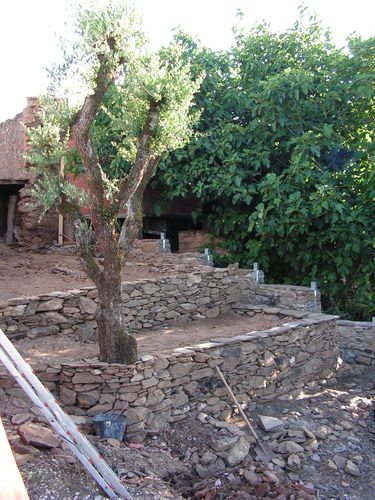
Because we didn’t need all the the stones that came from the front wall, we decided to make some more terraces. 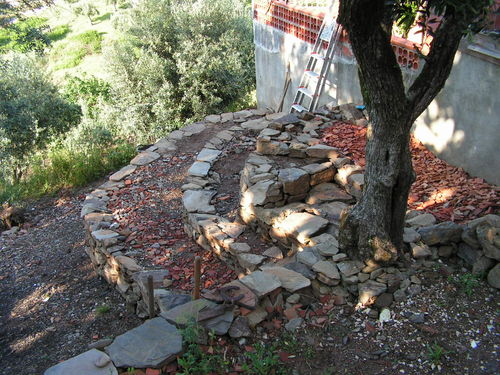 Next time; Building the new front wall.
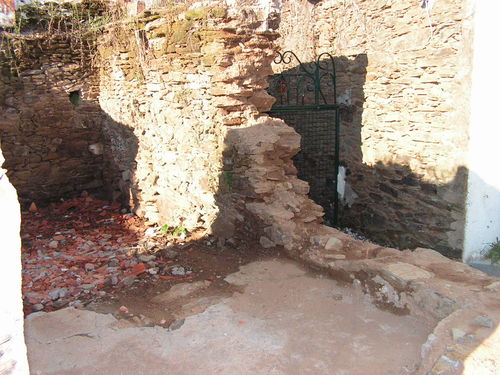
The more you dig down into the history of Portuguese building methods, the more respect you get for these craftsmen that made the dry stone walls. I’m not totally inexperienced in the matter. I’ve learned the process of looking for the stone’s face, how to stack them and fill the gabs in between, from a Turkish friend during my stay over there. We did get the all the wood out, and cleaned out most of the space. Just one corner was still filled with stones and dirt. We just didn’t find the energy at that time….
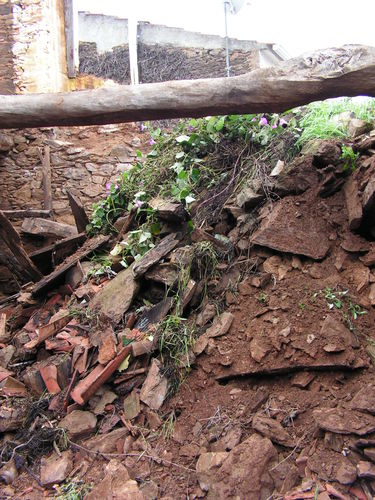
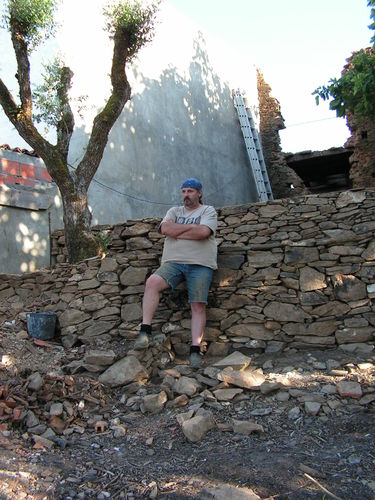
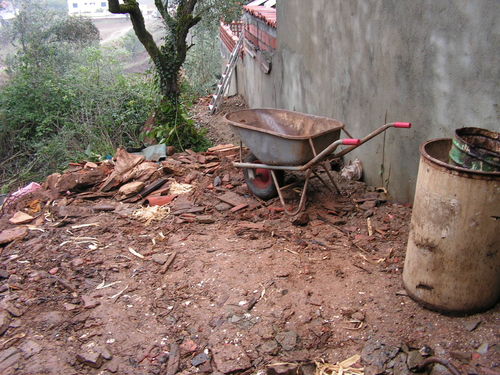
I couldn’t wait to start rebuilding but first we had to clean out the ruin totally. The pile of stones got higher and wider in the back garden and together with the clay that was used render the walls it became a solid “mountain”. That’s where the solution was. flattening out that steep sloping garden by making terraces. It ment making a strong wall between the raised up garden and the neighboring property. Now, there’s only a few pictures to show the work but it took another 3 months.
hen I’m talking about “we”, I mean myself and my lovely wife who worked “like a man” making concrete, moving big pieces of rock etc.
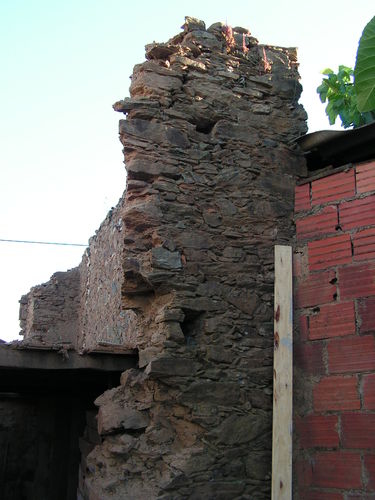
Now, there shouldn’t be a winter in Portugal, (that’s what they say in the tourism brochures) but we had 3 months of rainstorms…. The now exposed back wall collapsed with a big rumble in the middle of a December night. More cleaning up to do, more to rebuild.
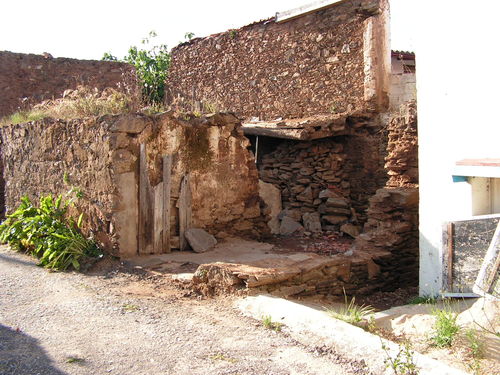
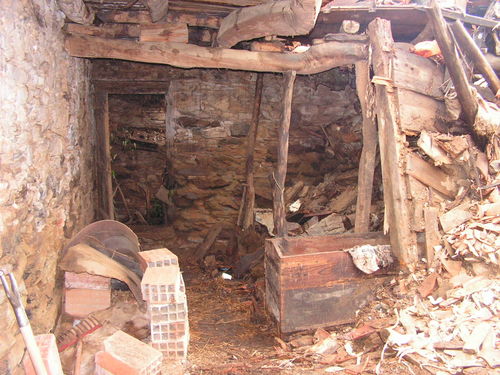
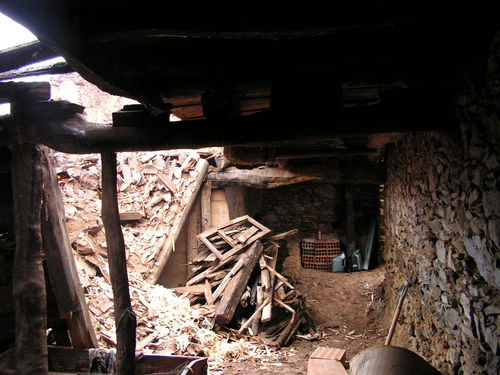
The ruin had a little side building, witch we left untouched up until then, but with having a way to go through the building and a place to stock the stones, made us decide to clean that out to, before starting with any rebuilding. Still no woodworking involved….. but you have to got endurance and determination to get a nice workshop.
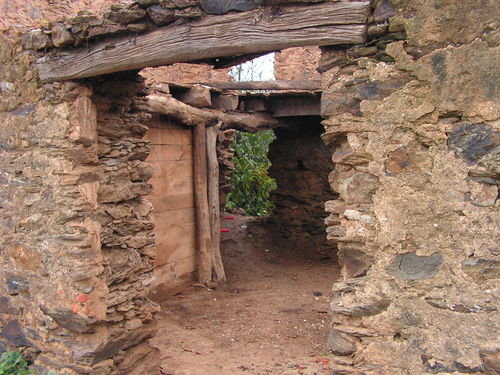
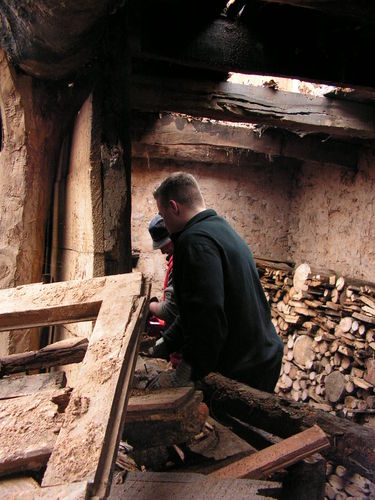
next time; slowly working towards the first stone of rebuilding. And there he was, our friend from the Netherlands to help us out. Just for a week or so. Soon we found out that it’s a big advantage to be 22, big and strong. Did we had thought of making a hole in the wall to get everything to the back yard? Yes, we did, but making a hole, where you can go through with a wheel barrel, into a 70 cm thick wall of stones, made us thinking about it, thinking! It must have been about 6 hours later, and there it was, our future door opening all the way up to the beam of the second floor window. 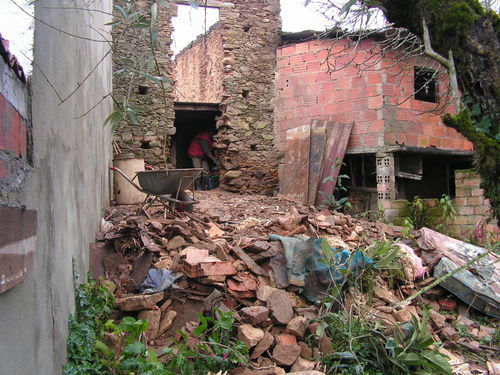 eWith the unstable second floor half hanging on the wall, supported with some beams, we started to take out as many wood as we could. 95% was just good enough to keep us warm that winter, the rest was cleaned, de-nailed (is that an English word?) and cut into movable lengths.
After a week of hard work, 3 chains and 25 liters of fuel for the chainsaw, the project started to show some progress.
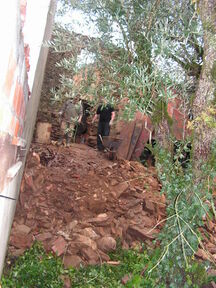
Down point however was the pile of stones in the garden… we had to do something with it. We couldn’t get it out of there, (the garden is on top of a hill, 60 meters up, and our neighbors wouldn’t have liked us throwing everything down the hill. The olive trees are sacred so any damage would get us in to real trouble.
next time: more stone, rock and dirt.
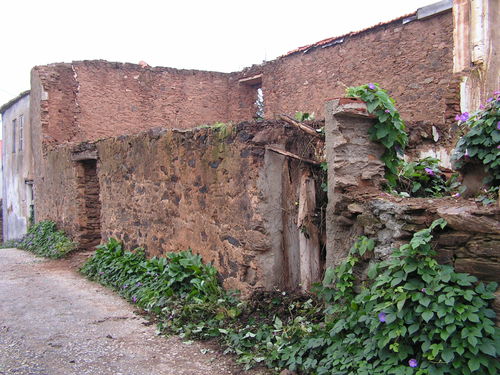
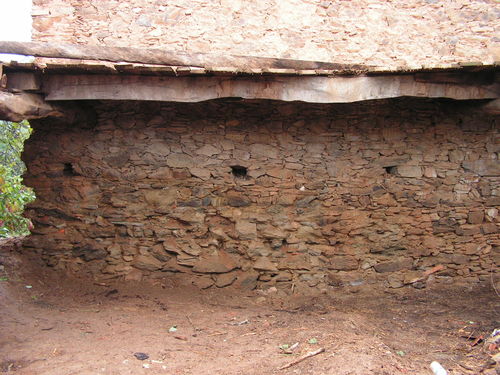
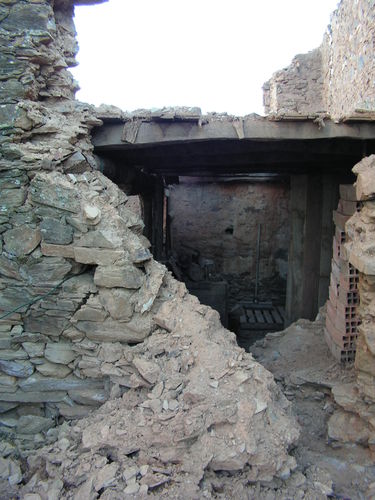
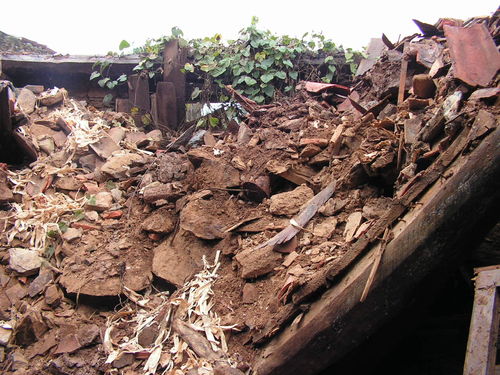
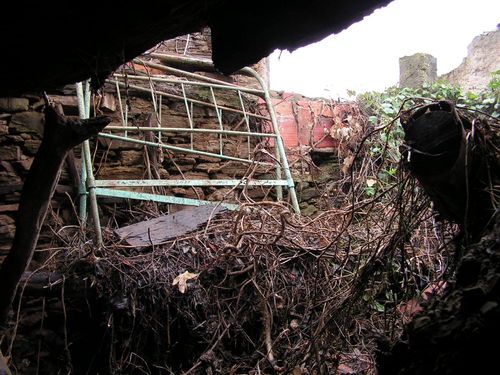
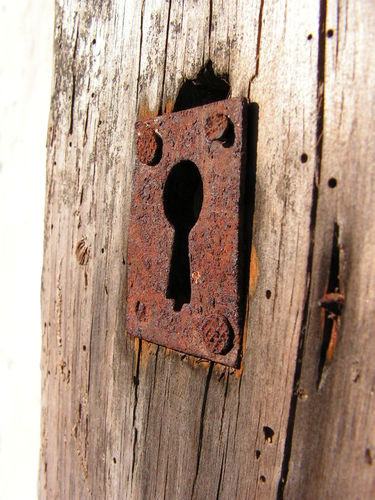
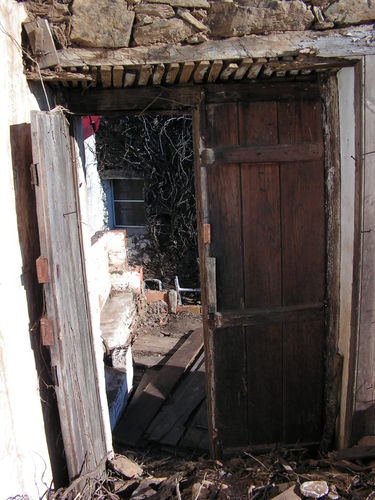
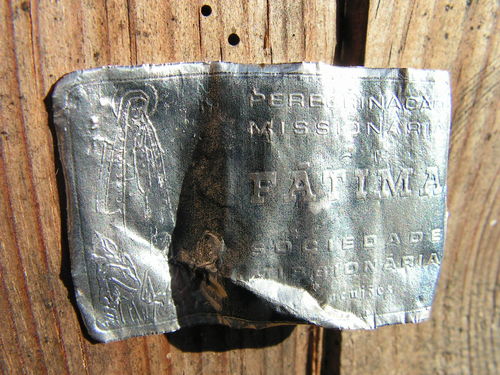
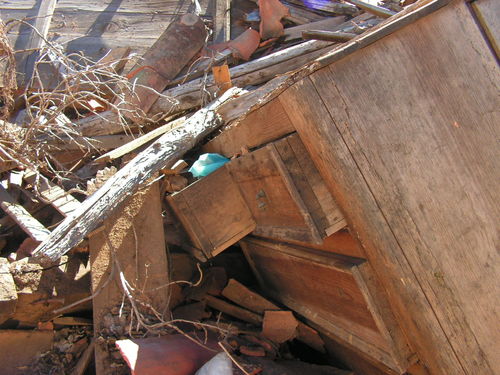
After the dust was gone we could see what we bought. It’s strange to realize that just a decade ago, somebody lived in this building. No water, no toilet, no electricity. It must have been a simple and poor life for the old lady that spend her last years in this, what used to be the main house of a farm. 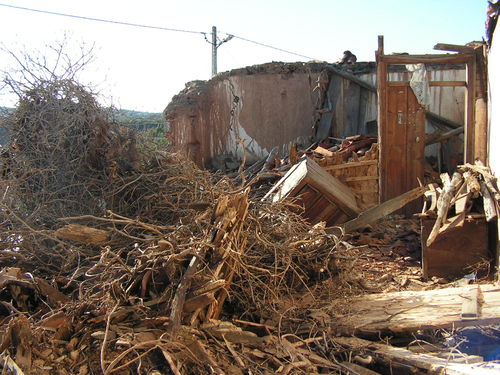 As a woodworker, tears get in to your eyes, seeing that the former owner didn’t clean out the property before putting it down. The big stone wall went half thru the floor, leaving a very unstable situation. A single steel bed in one corner, some 100 year old drawers smashed by big pieces of rock, every piece of wood completely eaten from the inside out by longhorn beetles. It became a journey in to the history of this former grand building. 3 garbage bags full of medicines, x-ray pictures and medical reports, it must have been a worrying life. It makes you realize how complicated we made our lives as you find 2 plates, 2 knifes, 2 forks, 2 spoons some pots and pans and a candle holder. Here and there little details remained, wooden doors that open without hinges, some catholic relics, some old tools and doorknobs.
The village we’re living in goes back to the times of the Templar knights, who had their headquarters at the Convento do Cristo in Tomar. Being surrounded by 70 cm thick walls, just stacked out of rocks and slate make your mind wandering of to medieval times.
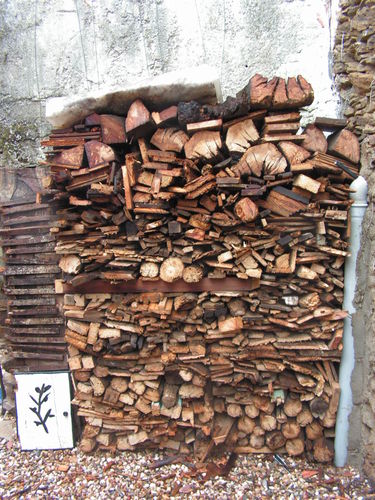
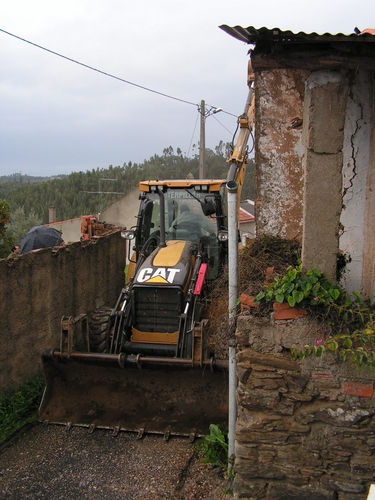
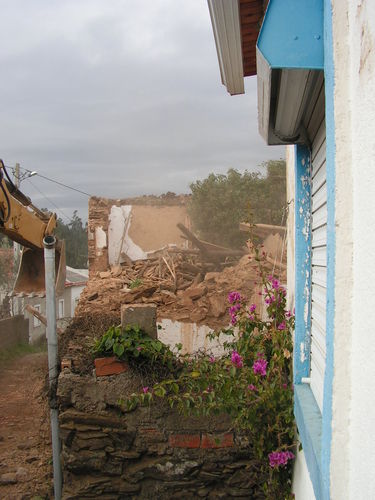
The first thing to do was get that floor empty by starting to take out all the wood. No, not much could be saved. Most of it ended in the wood-burner and it kept us warm for 2 winters. Luckily the 2 big beams that supported al the others are walnut and survived the 200 years well. We decided to keep them in, although it meant that the ceiling on the ground-floor would be low. After a few weeks of clearing out the top part, by throwing every thing over a 6 meter high wall in to the back garden, we got to realize that it would take ages to get all this heavy work done. While the wood could shortened by a chainsaw, the story on handling the pieces of rock is a different one. Trying to move 60 or 70 kilograms without any help seemed to be impossible. There were day’s we managed only 2 or 3. Just at the point of getting desperate, a call from The Netherlands was going to make a difference….. next time; Helping hands 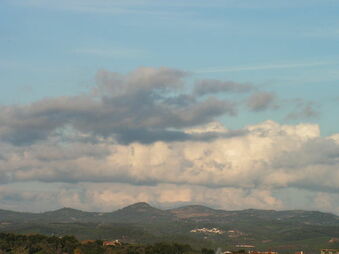 It all started in 2007. After selling our Dutch Art & Frame shop we were looking for a new challenge. We traveled around the globe a bit looking for a nice place to settle down and make a new start. (something you should consider every 10 years or so..) Yes, we’ve seen the wales at the coast of British Columbia, lived in a cabin on the beach of Roberts Creek for a while, but to start in the beautiful vicinity of the sunshine coast takes more money than we could ever come up with. We thought about moving to The Gambia but legal issues made that impossible. Having lived in Turkey before we looked for a piece of land to get our new dream started but although the people there are very nice….. the government decided otherwise. The good thing about traveling around is that it makes you look on pro’s and contra’s. What’s important? Coming from a busy life, being involved with almost all artistic and community projects, having worked 12 hours a day for the last 10 years, somehow a quiet and peaceful place looks like the best option. At some day in the spring of 2007 we saw this view from the balcony of a little 200 year old cottage in the heart of Portugal. It felt good. It forced us to decide. Now this blog is not on the restoration of the cottage, this community is all about woodworking. After a few years we bought the old ruin next to the house. The village counsel ordered the (former) owner to take down the second floor because it was so unstable that it could fall on the street. So, he did. All that remained was a big pile of stones. Then we, the strange Dutch couple living on top of the hill, bought that pile of stone….... turned in to a big pile of stones and broken beams. How and where do you begin? How to move all this without heavy machinery? By hand… stone by stone… Next time; Cleaning up the ruin.
|
Follow us on
Instagram! Categories
All
Looking Back
November 2017
|


 RSS Feed
